Automatic Deployment with CI/CD
When you develop your own web application it is very useful to deploy your code automatically. As soon as you push your code to the main branch of your repository or on any other event you can trigger a build pipeline which can run automatic tests, build your code and automatically pushs it to your Uberspace.
In comparison to manual deployment automatic deployment can speed up your development process. This process is called CI/CD (Continuous Integration/Continuous Delivery).
        ---
 title:
---
 flowchart LR
     GitRepository["Git Repository"] -- Build Pipeline --> Uberspace
Build Pipeline
There are several solutions available to automatically deploy your code to your Uberspace.
GitHub Actions
GitLab CI/CD
Gitea Actions
Note
For this guide you should be familiar with the basic concepts of git.
Prerequisites
Install or make sure the following command line tools are installed on your local machine
Git
Github CLI
Prepare Git Repository
Init a new Git repository isabells-website.
localuser@localhost ~ $ mkdir isabells-website
localuser@localhost ~ $ cd isabells-website
localuser@localhost ~ $ git init --initial-branch=main
localuser@localhost ~ $ gh repo create isabells-website --private --source=.
Add an src/index.html file to your git repository.
<html>
 <head>
 </head>
 <body>
  <h1>Hello World</h1>
 </body>
</html>
Commit your files.
localuser@localhost ~ $ git add --all
localuser@localhost ~ $ git commit -m "Init Isabell's Website"
Push the code
localuser@localhost ~ $ git push --set-upstream origin main
Your code should now be visible in your GitHub repository.
Deploy with GitHub Actions
In this guide, we push the code to the main branch on github.com. As soon as you push your changes to GitHub the GitHub Action is triggered which then automatically deploys the code to your Uberspace using Rsync.
        ---
 title:
---
 flowchart LR
     subgraph GitRepository["Git Repository"]
         LocalBranch["Local Git Branch"] -- push --> Remote["Remote Main Branch"]
     end
     subgraph GithubActions["Github Actions"]
         Remote -- triggers on push --> GitHubActionCheckout["Checkout the Branch"] --> GitHubActionRsync["Deploy using Rsync"]
     end
     GitHubActionRsync --> Uberspace
In the next steps we push code to the GitHub Remote Repository, create the Github Action, set the variables and SSH secrets and test the deployment process.
Add Github Action
GitHub Actions are basically YAML files stored within your repository. Those files define the steps which are automatically executed by any action, in our example: “Push to main”.
Create .github/workflows/deploy-to-uberspace.yml within the isabells-website folder.
name: Deploy Isabell's Website to Uberspace
on:
  push:
    branches: [main]
jobs:
  build-and-deploy:
    runs-on: ubuntu-latest
    steps:
      - uses: actions/checkout@v4
      - name: Deploy using Rsync
        uses: burnett01/rsync-deployments@6.0.0
        with:
          switches: -avrh --delete --exclude=".git" --exclude=".github"
          path: src/
          remote_path: /var/www/virtual/${{ vars.SSH_USERNAME }}/html
          remote_host: ${{ vars.SSH_HOST }}
          remote_user: ${{ vars.SSH_USERNAME }}
          remote_key: ${{ secrets.SSH_PRIVATE_KEY }}
          remote_key_pass: ${{ secrets.SSH_PRIVATE_KEY_PASS }} # Only needed if you added a passphrase upon creating the SSH key
The name is shown in the UI of GitHub Actions to track the process of your deployment. The on is the trigger. In our case push to the main branch. The job with the name build-and-deploy runs on ubuntu-latest
It automatically checks out the code to the runner and deploys the code to Uberspace using rsync.
We are using an existing GitHub action called burnett01/rsync-deployments@6.0.0: Use the –exclude switch to identify any file or folder that you do not want included in the deploy. The path is the directory which you want to deploy. In our case it is the folder with the index.html, the src directory. The remote_path describes where we want to copy our website on the Uberspace. All remote_… params use secrets or variables. Those are set on the GitHub UI.
Push your code changes.
localuser@localhost ~ $ git add --all
localuser@localhost ~ $ git commit -m "Add Github Actions"
localuser@localhost ~ $ git push
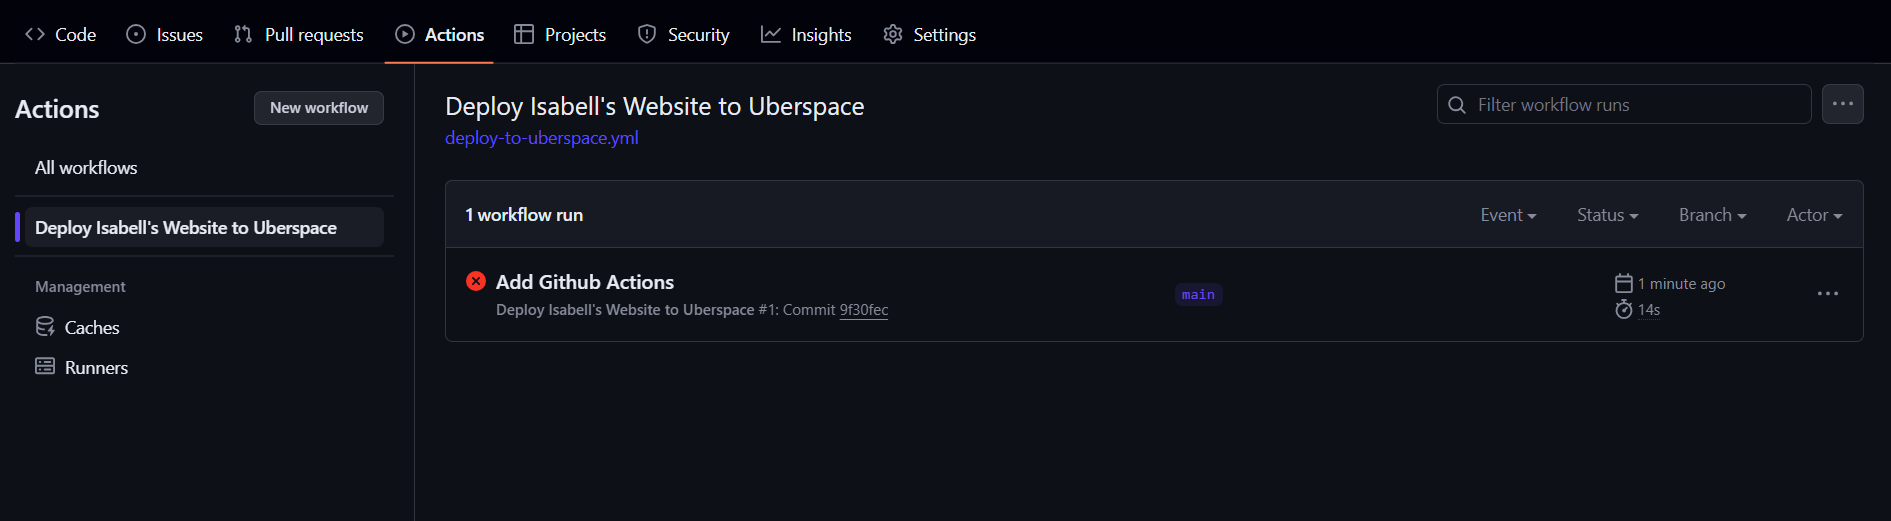
You can now see your GitHub Action to run and fail. This is because the variables and secrets are not yet set. This we will do in the next step.
Set secrets and variables
The integrated secret manager in GitHub allows you to save the SSH-Key, username and hostname.
In your GitHub repository go to:
Settings
Secrets and variables
Actions
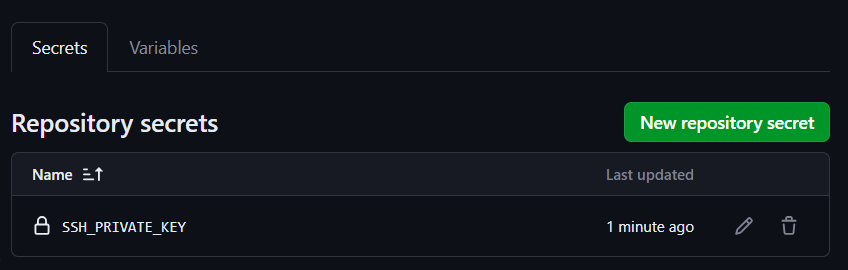
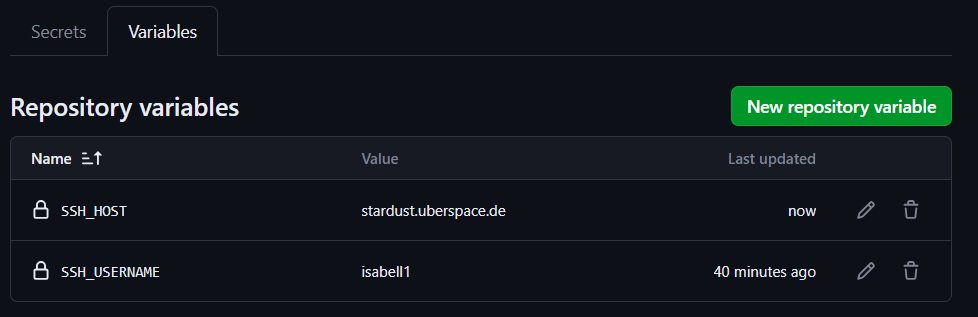
Add the variables and secrets. Make sure you store the secrets in the Secrets tab (using the “New repository secret” button) and variables in the Variables tab (using the “New repository variable” button).
Type |
Name |
Value |
|---|---|---|
Secret |
SSH_PRIVATE_KEY |
Your private SSH Key |
Secret |
SSH_PRIVATE_KEY_PASS |
The private SSH Key’s passphrase (if any) |
Variable |
SSH_USERNAME |
Your username, don’t add any whitespace (e.g. isabell) |
Variable |
SSH_HOST |
Your hostname, don’t add trailing dot . or whitespace (e.g. stardust.uberspace.de) |
Re-run job
After you set the variables you can manually retrigger the process.
- In GitHub go to
Actions
Open the previously failed job
Click “Re-run jobs”
Click “Re-run all jobs”
Your deployment action should then look like that.
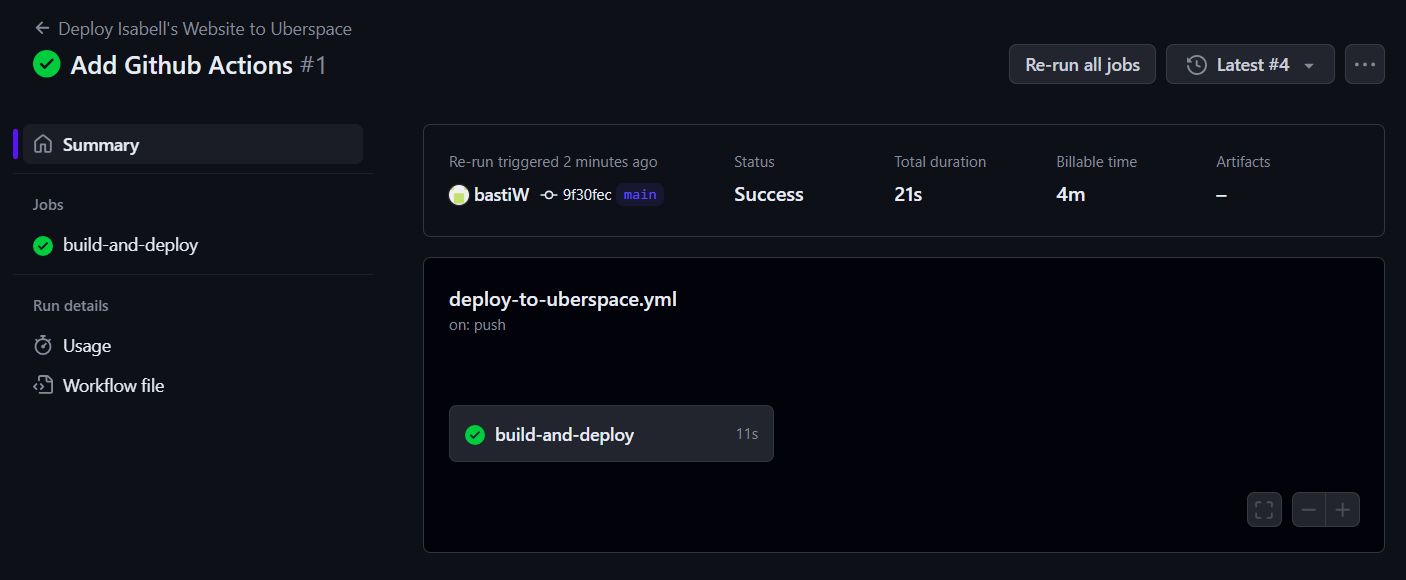
When you now check website you should see the “Hello World” Page.
Run automatically by code push to GitHub
Now it is time to trigger the deployment by a code change.
Open src/index.html and replace the content.
<html>
    <head>
    </head>
    <body>
     <h1>Isabell's Website</h1>
    </body>
</html>
Push your change to the repository.
localuser@localhost ~ $ git add --all
localuser@localhost ~ $ git commit -m "Isabell's Website"
localuser@localhost ~ $ git push
Check the GitHub Actions again. Wait till it is deployed.
🚀 Congratulations! “Isabell’s Website” should now be hosted on your Uberspace.
Debugging
In case of errors, check the job. When the error text is not helpful, retrigger the run and check the checkbox “Enable debug logging”
Extend it (optional)
Some applications require a build step. You can include those steps into the actions before you sync the code via Rsync.
Use different triggers. Sometimes it is required to trigger your deployment on different triggers. In our guide we are using push to the main branch. You can also modify that behaviour so that you have separate deployments for every branch to a different folder on your Uberspace, or even for every created tag or feature branch.
Securing your deployment process (optional, advanced)
When you use the automatic deployment process, you have to be aware that your SSH key is stored on the CI/CD provider’s infrastructure.
Anyone with your SSH key can run any command on your Uberspace. If you use the recommended way to save your SSH Key, your key should be safe from being abused. This assumes, that your CI/CD provider (e.g. Github/Gitlab) does behave correctly and their infrastructure is secure.
For adding an additional layer of security, you can lock down the SSH key to only allow the rsync command and writing only to a specific directory on your Uberspace.
Note
For the following steps you need to have a working deployment process. If you haven’t set up the automatic deployment yet, please follow the steps above.
First we need to install the rrsync script on your Uberspace in the folder ~/bin. This script is a wrapper around rsync and allows you to restrict the rsync command to a specific directory. You can download the latest script from the Samba Website.
[isabell@stardust ~]$ cd ~/bin
[isabell@stardust bin]$ wget https://www.samba.org/ftp/unpacked/rsync/support/rrsync
After downloading the script, you should check the content of the script and make sure it is not malicious. For this you can use the cat command to print the content of the script.
[isabell@stardust bin]$ cat rrsync
When you are sure that the script is safe, you have to make it executable. After this, you can test, that the installation was successful by running the script.
[isabell@stardust bin]$ chmod +x rrsync
[isabell@stardust bin]$ ./rrsync
You should get an output similar to this:
./rrsync error: the following arguments are required: DIR
usage: rrsync [-ro | -wo] [-munge] [-no-del] [-no-lock] [-no-overwrite]
              [-help]
              DIR

Use "man rrsync" to learn how to restrict ssh users to using a restricted
rsync command.

positional arguments:
  DIR            The restricted directory to use.

optional arguments:
  -ro            Allow only reading from the DIR. Implies -no-del and -no-
                lock.
  -wo            Allow only writing to the DIR.
  -munge         Enable rsync's --munge-links on the server side.
  -no-del        Disable rsync's --delete* and --remove* options.
  -no-lock       Avoid the single-run (per-user) lock check.
  -no-overwrite  Prevent overwriting existing files by enforcing --ignore-
                existing
  -help, -h      Output this help message and exit.
After installing the scipt, we need to tell the SSH server to use this script for the SSH key and restrict the key to only write to a specific directory.
For this step, we need to edit the ~/.ssh/authorized_keys file. You can do this with your favorite text editor.
We will assume that your SSH public key you use for deploying is ssh-ed25519 AAAAC3NzaC1lZDI1NTE5AAAAI[...] deploy_key@github.com.
This is the key that you added to your Uberspace in the previous steps.
When editing the ~/.ssh/authorized_keys file, you should see a line containing the public key.
You have to prepend the line with
command="~/bin/rrsync -wo <path>",restrict
Note
Make sure to replace <path> with the path to the directory you want to write to and add an space between restrict and the beginning of the key.
The line should now look like this, if you want to restrict the key to only write to /var/www/virtual/isabell/html:
command="~/bin/rrsync -wo /var/www/virtual/isabell/html",restrict ssh-ed25519 AAAAC3NzaC1lZDI1NTE5AAAAI[...] deploy_key@github.com
After this step, the key is restricted to only write to the specified directory.
Note
After this step your deployment should fail, because the key is now restricted and rrsync rewrites the remote path to the restricted path. If you previously used /var/www/virtual/isabell/html rrsync will rewrite this to /var/www/virtual/isabell/html/var/www/virtual/isabell/html which is not a valid path.
To fix this, you have to change the remote_path to /.
Below are guides on how to change the remote_path for different CI/CD providers.
Github
For Github you have to change the file .github/workflows/deploy-to-uberspace.yml in your Git repository.
Replace the path in the remote_path variable with /.
If you used the given example, the file should look like this:
name: Deploy Isabell's Website to Uberspace
on:
  push:
    branches: [main]
jobs:
  build-and-deploy:
    runs-on: ubuntu-latest
    steps:
      - uses: actions/checkout@v4
      - name: Deploy using Rsync
        uses: burnett01/rsync-deployments@6.0.0
        with:
          switches: -avrh --delete --exclude=".git" --exclude=".github"
          path: src/
          remote_path: /
          remote_host: ${{ vars.SSH_HOST }}
          remote_user: ${{ vars.SSH_USERNAME }}
          remote_key: ${{ secrets.SSH_PRIVATE_KEY }}
          remote_key_pass: ${{ secrets.SSH_PRIVATE_KEY_PASS }} # Only needed if you added a passphrase upon creating the SSH key
Written by: Sebastian Weiss <https://sebastianweiss.io>, Marlena Müller <https://marlena.app>